Create your own workflow template
You use a template to design the tasks you need completed in a workflow. When you want to start a workflow, you select the template where the tasks are already defined. You can update existing workflow templates in a workflow editor to configure that your organization requires. You can also create your own template with no existing Activities, Transitions, Workgroups, Actions, or Status.

Required permissions
 You must have permission to the Projects Module to work with projects and workflows.
 However, keep in mind that administrators and other users can set permissions on components and folders.
- You must have permission to edit the workflow template component.
- You must have folder permissions where the template is stored.
- For details on how to check and set permissions, refer to: Set permissions.
 For a complete list of permissions, including starting a workflow from a template, read: Workflow permissions.
Understand how the editor works
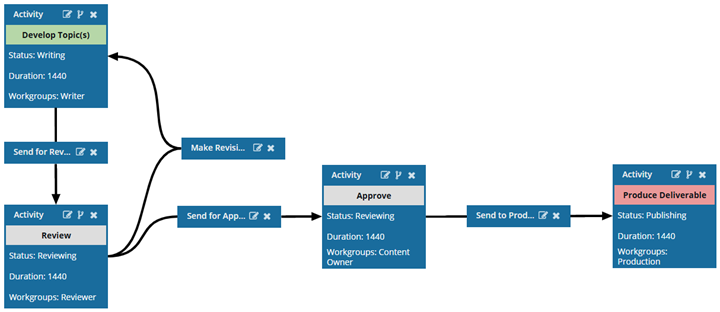
The workflow editor uses visual elements to help you create the workflow.
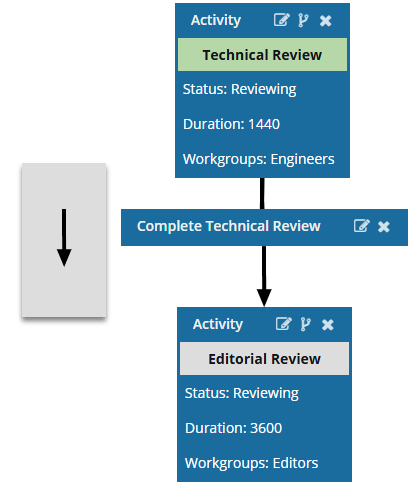
- A square represents an Activity.
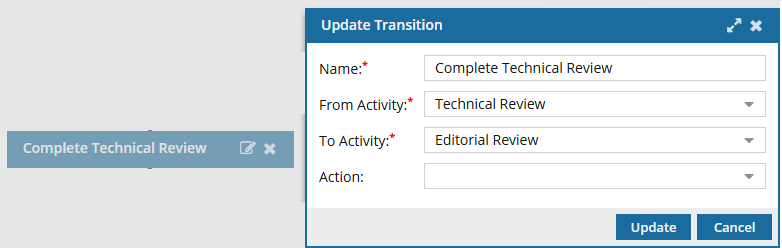
- A rectangle represents a Transition.
- A black arrow connects a Transition from the first Activity to the second Activity.
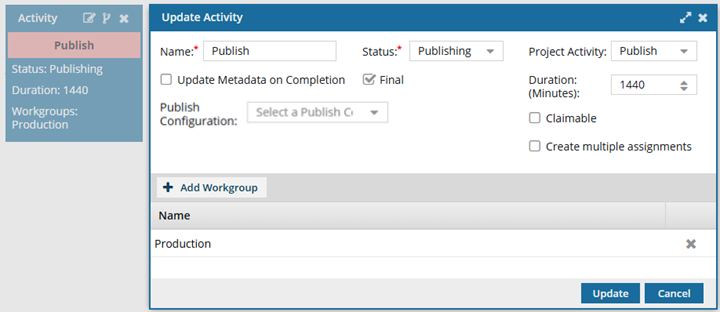
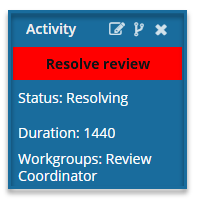
- A red title indicates that there is an error in the configuration.
For example, in an Activity, the Project Activity field is required and cannot be left blank.
- The Project Activity field is not marked with a red asterisks, and you can create a new Activity without selecting a Project Activity.
- If you leave it blank, after you Create or Update the Activity, the Name is highlighted in red.
- The Save and Submit options are not available until you correct the errors in the workflow template.
- You must correct any errors before you can Save or Submit the workflow template.
 For more information, read: Use the workflow editor.
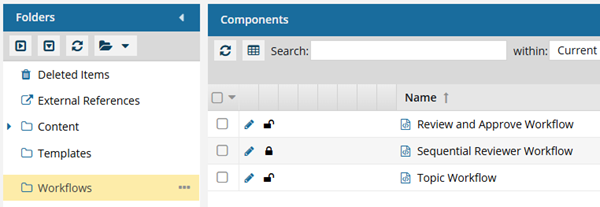
Checklist for an empty template
After you create a new component with a Type of Workflow, there are no default configurations built yet.
Create a workflow template component
When you open the workflow template, the editor shows a blank canvas for you to add workflow steps.
![]()
To create a workflow, add pieces in the following order:

- Add Statuses. These are used when configuring an Activity. You track the progress of a content development Activity by assigning it a Status. In the templates that Inspire provides, the following statuses are included: Writing, Reviewing, and Publishing. Add a new status to a workflow template
- Create Workgroups. These are used when configuring an Activity. You must have a list of users who can complete the work for a project Activity. For example, if the Activity is a legal review, you would create a Workgroup that includes your company lawyers. Create a new template workgroup
- Create Activities. These are the workflow tasks that are completed by users in the assigned Workgroup. You will need to create at least two Activities, one as the Initial and one as the Final. Add a new activity to a workflow template
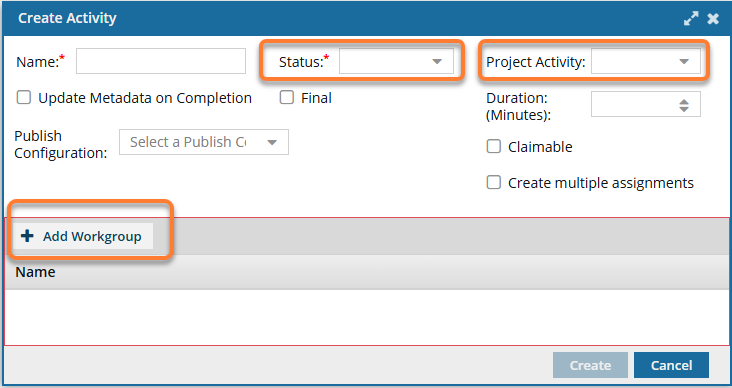
- Define any known Actions. These are optional when you configure a Transition. If there is also an Action to be performed, such as Take a snapshot, you can create the Action and then add it to the appropriate Transition. Create an action in a template
- Actions you identify are normally completed by the user who is advancing the workflow when they mark a task as Complete.
- Currently, there is a limited list of automated Actions that can be performed by Inspire.
InspireCreateReview (Add a Create Review Action to a topic workflow template)
InspireCreateApproval (Add a Create Approval Action to a topic workflow template)
- InspireApprove (Add an Inspire Approve Action to a topic workflow template)
- InspireUnapprove (Automate unapprovals in a workflow)
- InspireCreateTranslation (Automate translation in a workflow template)
- InspirePublish (Automate publication in a workflow template)
- InspireCompletenessReport (Automate completeness reporting in a workflow template)
- InspireTranslationCompletenessReport (Automate translation completeness reporting in a workflow template)
- Connect two activities with a Transition. You use Transitions to identify what should happen when a workflow Activity is completed. For example, after a technical review, you can create a transition that specifies the files should go to an editor for review. You can also assign an action to the transition to trigger a process or let a user know what task is queued next in the workflow process. Create transitions in a template
- You create a Transition in the following ways:
- Use an Activity's title bar and select
 the Create Transition option
 - Copy and paste an existing Transition and then edit it
- Use an Activity's title bar and select
- You create a Transition in the following ways: