Create a new template workgroup
Inspire provides you with workgroups that you can use to collect participants who are needed to complete task activities. If you have a skill set specific to your organization's workflows, you can create a new workgroup.
 You must have permission to work with workflow templates.
- By default, only users with the following permissions can create project workflows and assignments:
- Administrator permissions
- Access to the Project Module with the Create permission
- Even if you don't have these permissions, you can be granted a special permission to create workflows and project assignments after a project is created.
- If you are an administrator, refer to Allow users to create project assignments and workflows.

 Tips and tricks
If you want to learn more about the default Workgroups provided by Inspire, read Manage template workgroups.
- If you just want to change the workgroup used in an Activity, follow the steps in: Update an activity's workgroup.
- You can also edit an existing workgroup instead of adding a new one. Follow the steps in: Edit template workgroups.
- Workgroups are specific to the template where they are created. If you want to use the same Workgroup in multiple templates, you must open each template and create the Workgroup.
- After you assign users to Workgroups, their names are pre-populated in workflow templates and when a workflow is started.
Workgroups are especially important for the Assign User by Metadata feature.
- This option lets you pull in a component's element or attribute that contains an email address. Inspire automatically assigns the Activity to that user, rather than requiring a user in an active workflow to make the assignment.
- Inspire inspects the first component in the assignment and evaluates the XPath statement. If it encounters any errors, the Activity is assigned to the user in the Fallback User field on the Next Activity screen, rather than in the Assign To field.
- For more information, read: Assign a workflow activity using metadata
To create a new workgroup:
-
Click
 Components.
-
In the Folders pane, select Workflows.
 If you have moved the template to another folder, go that location instead.
 -
In the Components pane, select a workflow.
To open the template, do one of the following:
- Double-click the file
- Right-click the file, and then select Edit...
- Click
 the Options menu, and then select Edit...
 Results: You see the workflow activities and transitions in the editor.
 -
On the toolbar at the top of the editor, click
 Workgroups.
Results: You see the Workgroup Management screen.
Workgroups.
Results: You see the Workgroup Management screen.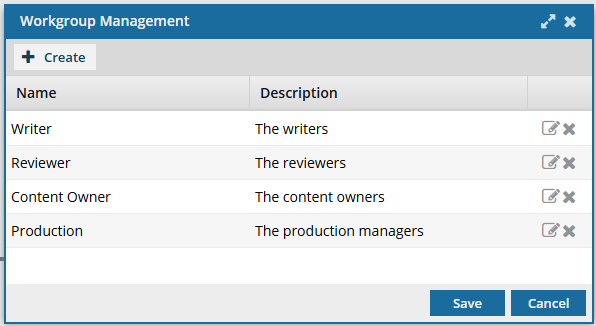
-
On the Workgroup Management screen, click Create.
Results: You see the Create Workgroup screen.
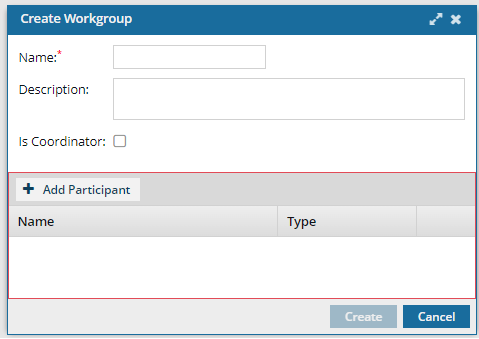
-
If you want this workgroup to only include the user who creates the workflow using this template, select Is Coordinator.
If you select Is Coordinator, then you cannot add participants to the Workgroup. You can skip Step 9 and go directly to Step 10.
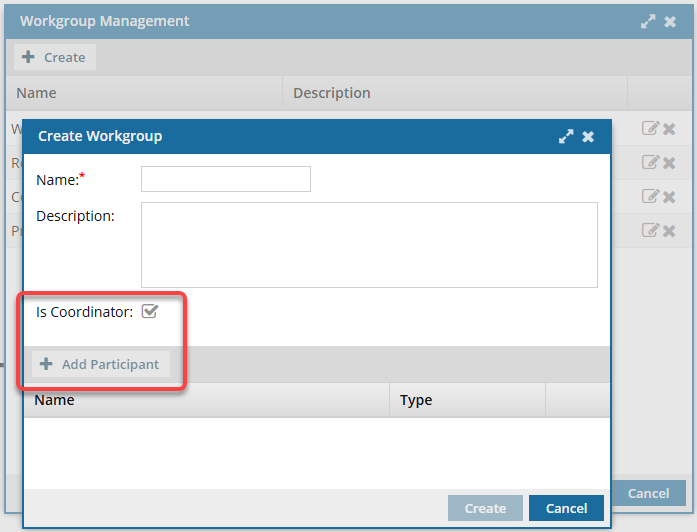
-
If you did NOT select Is Coordinator, then select
 Add Participant.
-
On the Select Users/Roles screen, select one or more users or roles.
 Notes:
- The list of users is not limited to who has been included in the project.
- If a user is selected or in a role but not a participant in the project where a workflow is being created, then Inspire adds that user to the project.
-
Click Select.
Results:
- You can see the list of users and roles you have added to the new workgroup.
-
On the Select Users/Roles screen, select one or more users or roles.
-
To save your changes, click Create.
Results:
- You can see your new workgroup listed on the Workgroup Management screen.
- You can select your new workgroup when you create or edit an Activity.
You can now:- To assign your new workgroup and activity, Manage workflow template activities.
- If you are done updating the workflow, to close the workflow editor, click
 Save and Submit.
 - If you want to keep working but save your changes locally, click
 Save Progress.