Rename a workflow template
You can change a workflow template's display name in the Components browser if necessary. You can rename a component using the Options menu or the right-click option.

- Required permissions
- Tips and tricks
- Rename a workflow using the Options menu
- Rename a workflow using the right-click menu

Required permissions
 You must have permission to the Projects Module to work with projects and workflows. Other than that, you do not need special permissions to create, edit, or delete workflow templates.
 However, keep in mind that administrators and other users can set permissions on components and folders.
- You must have permission to edit the workflow template component.
- You must have folder permissions where the template is stored.
- For details on how to check and set permissions, refer to: Set permissions.
 For a complete list of permissions, including starting a workflow from a template, read: Workflow permissions.
Tips and tricks
- Renaming a component in the Component's browser DOES change:
- The name displayed when searching, sorting the grid, adding a component to a project, sending a component to translation, and in the Deleted Items folder.
- The location of the component in the hierarchy when sorted by Name.
- Renaming a component in the Component's browser does NOT change:
- The file name, which includes a GUID and file extension. For example: Classified_catalogs_5d515c7d-2f8d-4b81-b19d-c5e611692c39.XML
- The component's topic Title. For example: Classified catalogs of books on art.
Rename a workflow using the Options menu
-
Click
 Components.
-
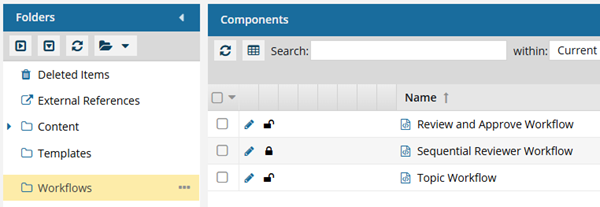
In the Folders pane, select the Workflow folder.
 You can save a workflow template to another folder. If you did this, open that folder instead of the Workflows folder.
 -
In the Components grid, click the workflow's
 Options menu, select Actions, and then select Rename.
-
In the Name text box, do one of the following:
- Delete the old name and enter a new one. Press Enter.
- Edit the existing name. Press Enter.
 Results: Inspire refreshes the component hierarchy.
- The renamed component is highlighted.
- The renamed component displays in the correct place in the alphabetized hierarchy according to its name when sorted by the Name column.
- If you look in the component's Details, and select the History tab, you see a new entry for the name changes.
- Look in the Action column to see Update.
- Look in the Type column to see Rename as the process type.
Look in the User column to see your name.
The Last Updated By column won't change to your name because you didn't update the content.
Rename a workflow using the right-click menu
-
Click Components.
-
In the Folders pane, select the Workflow folder.
You can save a workflow template to another folder. If you did this, open that folder instead of the Workflows folder.
-
In the Name text box, do one of the following:
- Delete the old name and enter a new one. Press Enter.
- Edit the existing name. Press Enter.
Results: Inspire refreshes the component hierarchy.- The renamed component is highlighted.
- The renamed component displays in the correct place in the alphabetized hierarchy according to its name when sorted by the Name column.
- If you look in the component's Details, and select the History tab, you see a new entry for the name changes.
- Look in the Action column to see Update
- Look in the Type column to see Rename as the process type
Look in the User column to see your name.
The Last Updated By column won't change to your name because you didn't update the content.