Edit nodes in the Outline pane
When you edit a document, you can see the changes that you make to the structure in the Outline panel. Looking at the structure not only shows you the location of your modifications but also the hierarchical dependencies between elements. You can use the Outline panel to understand the document structure and how element tags are nested.
 Tips and tricks
- If you want to see other topics that reference the one you are editing, follow the steps in Find relationships with other topics in the Outline panel.

To edit nodes in the Outline pane:
-
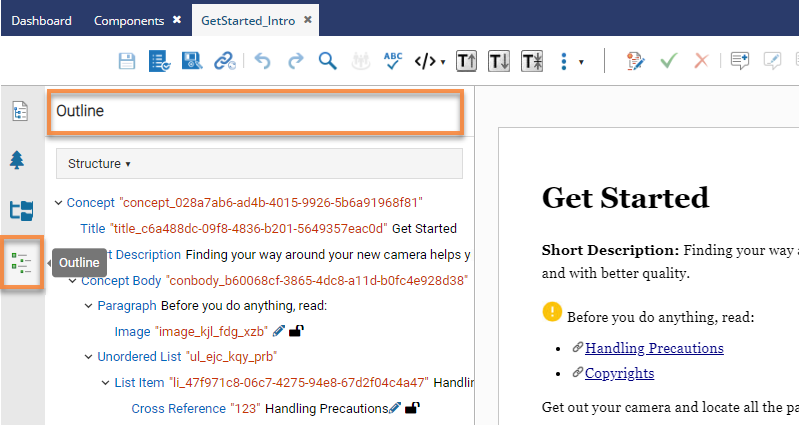
In the editor, the Outline panel is shown by default.
- If you don't see it, either click
 the Show arrow or
  the Outline option.
 You may or may not see element IDs. An administrator can configure an element to never be assigned an ID.
 In the Oxygen editor, when you select
 Generate IDs, Inspire only puts a valid ID on elements if the NeedsId identifier is selected in their element configuration. Administrators can follow the steps in: Configure an element as NeedsID.
If an element is configured not to use IDs:
- When content is imported, no ID is generated
- In the Oxygen editor, no ID is generated when the Generate IDs or Save and Submit options are used
- This behavior is enforced even if the AautomaticIds option is turned on.
- If you don't see it, either click
-
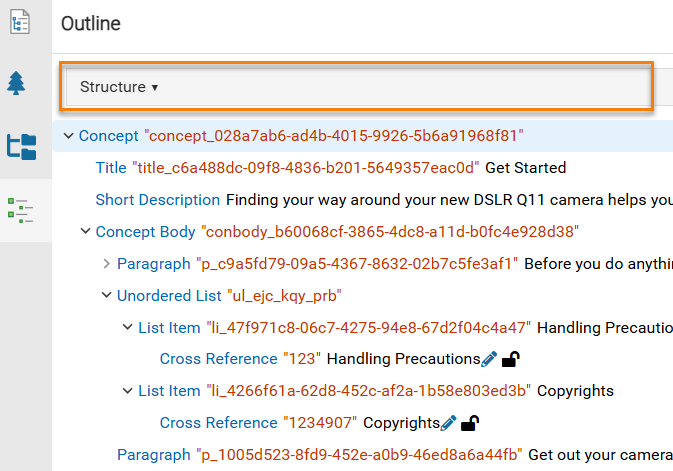
In Structure, do any of the following:
-
To see the status of referenced files, look for the icons following the name of a referenced file.
 In the Components grid, Inspire uses the six unlabeled columns before Name to display an icon. You can see two of those icons after the Name in the Outline pane, which provide more information about the file you are referencing. You can see an icon for the following conditions:
- State (
 Draft,
  Invalid XML,
  Approved ,
  Signed,
  Needs Translation)
 - Lock (
 Unlocked,
  Locked by you,
  Locked by another user,
  Locked by Inspire,
  Approved and locked )
You don't see icons for the following conditions:
- Branch (
 ,
,  ,
,  )
) - Attachment (
 ,
,  ,
,  )
) - Follow (
 ,
,  )
) - Referenced (
 )
) - Shared (
 )
)
- State (
-
To show less detail about an element, collapse the entry by clicking
 the down arrow.
-
To show more detail about an element, expand the entry by clicking
 the right arrow.
-
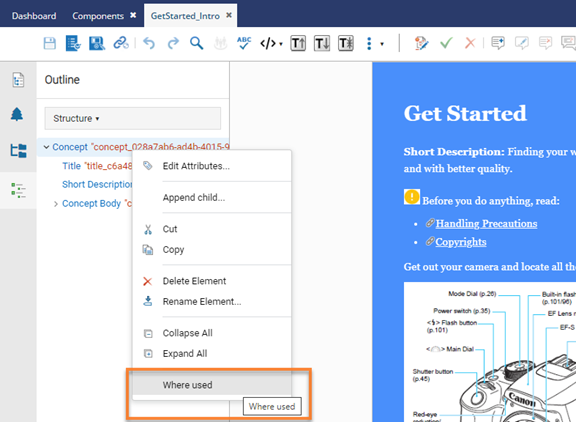
To access a menu of options, right-click an element in the pane.
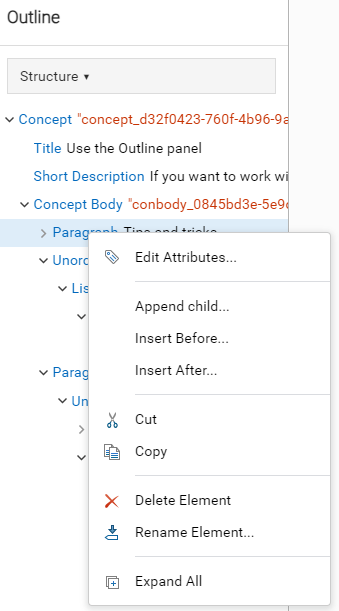 The options you can see change depending on the type of node you select.
 -
To see other topics that reference the one you are editing, from the right-click menu select the Where used option.
-
To see the status of referenced files, look for the icons following the name of a referenced file.