Create an export configuration
You can define the content you want to download from Inspire using export configurations. You'll need to specify the type of component in Source Components and, within that component, which referenced content you want to export.
 Required permissions
You must have administrator permissions to work with export configurations.
- If you go to the top menu and can see the
 Administration option, then you have the necessary permissions.
 - If you can't see the Administration menu, contact your local administrator.

 Tips and Tricks
- You must create your own XSLT that can transform the XML structure in the files you want to export.
- You must import your XSLT into Inspire to add it to an export configuration. Follow the steps in Import components.
- You can create a Secure File Transfer Protocol (SFTP) export configuration to send Inspire files to your SFTP server. Follow the steps in: Create an SFTP export configuration
- After you create an export configuration, you can save it under a new name. Follow the steps in Save an export configuration with a new name.
- For more information on relations and source components, read Configure what content is exported.
- For help on using a plugin, follow the steps in Configure plugin parameters.
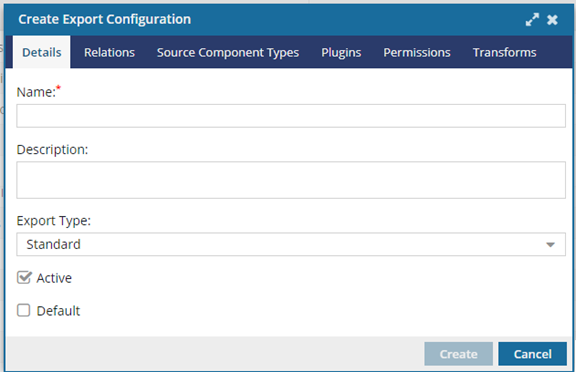
To create an export configuration:
-
From the Administration menu, select Export configuration.
-
On the Details tab, specify any optional information:
-
To use this export configuration automatically when users export, publish, or translate components, select the Default option. Keep in mind that users can select an option other than the default.
Note: Inspire users who click Publish automatically see this export configuration selected in the Publish Configuration drop-down box.
- If you don't select the Default option for any export configurations and only one export configuration is defined for that type, that one configuration is used.
- If you don't select the Default option for any export configurations and there are multiple export configurations for this Export Type, the first default configuration in the list is used.
- If you select the Default option for multiple export configurations for this Export Type, the first default configuration in the list is used.
- To see the list of export configurations, go to the Administration module and select Export Configuration.
-
To use this export configuration automatically when users export, publish, or translate components, select the Default option. Keep in mind that users can select an option other than the default.
-
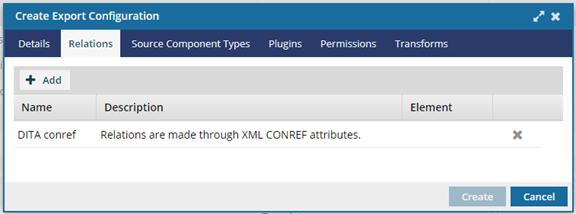
Optionally, to add an element name and limit the export to only the specified element relationship:
-
To limit the export configuration to a specific element relationship, in the relations row, click the Elements column, and use the drop-down arrow
 to select the element name.
Note: By default, the element name is empty, and all relations apply to all element types defined within the relation.
to select the element name.
Note: By default, the element name is empty, and all relations apply to all element types defined within the relation.
-
To limit the export configuration to a specific element relationship, in the relations row, click the Elements column, and use the drop-down arrow
-
Optionally, to limit the downloaded content to only the types you specify:
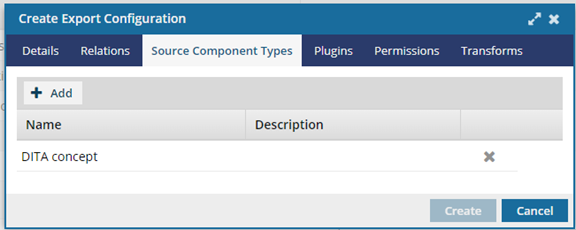
- On the Create Export Configuration dialog, select the Source Component Types tab.
- Click Add.
- On the Add Source Component Types dialog, select the checkbox next to one or more source component types.
- Click Add.
-
Optionally, to use a plug-in for formatting the output:
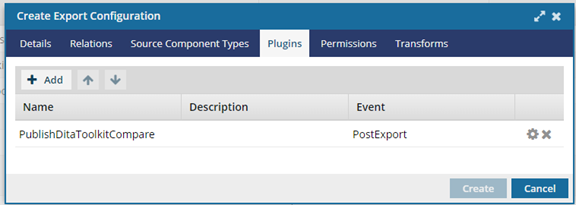
- On the Create Export Configuration dialog, select the Plugins tab.
- Click Add.
- On the Available Plugins dialog, select the checkbox next to one or more plugins.
- Click Add.
-
To change the order of plugins, in the toolbar, use the Up
 and Down
  arrows.
- To save the plug-in information, click Create.
- On the Export configuration tab, to reopen the export configuration you just created, double-click it.
- On the Update Export Configuration screen, select the Plugins tab.
-
To set plugin parameters, click Settings
 and follow the steps in Configure plug-in parameters.
-
Optionally, to limit which users and roles can select this export configuration:
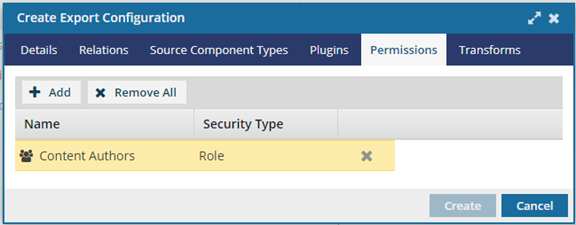
- On the Create Export Configuration dialog, select the Permissions tab.
- Click Add.
- On the Select Users/Roles dialog, select the checkbox next to one or more users and roles.
- Click Select.
-
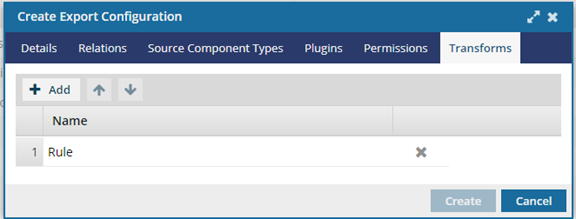
Optionally, to use an XSLT to transform output:
-
Click
 Add.
Add.
-
If you have multiple rows of stylesheets, you can set the order in which they are applied.
● To move an XSLT up in the order, click the up arrow.● To move an XSLT down in the order, click the down arrow.
-
Click