Complete workflow tasks for a project assignment
Participants with assignments in a workflow can complete their assignment and advance the workflow to the next task and participant.
 Tips and tricks
- You can also manage your assignment from the Dashboard tab.
- All the options you have when opening an assignment are available on the Dashboard.
- For more details, read View recent activity on the Dashboard
- Inspire sends you an email when you have a new project assignment. You can use this notification to open the project assignment and read the details.
The notification looks similar to the one in the figure below.
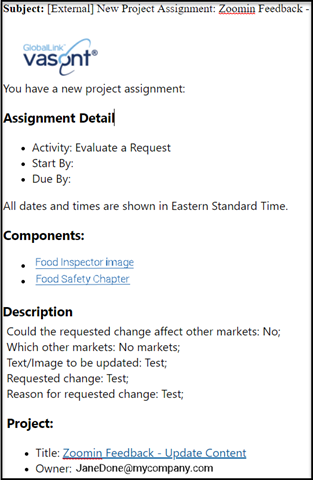 You can use the email to:
- Know when you should start on the project and when it's due (in Assignment Detail).
- Know what task you're supposed to complete. In the example above, you need to evaluate a request (in Assignment Detail).
- Click a link to quickly open a component or a binary file, such as an image, to review (in Components).
- See any details the project owner sent with the assignment (in Description).
- Click a link to quickly open the project your assignment belongs to (in Project).
- See who the project owner is (in Project).
- Some assignments are initially shared among a group of users, including you. When this happens, the first person to set the assignment's status to In Progress claims it and is responsible for completing the work.
The Notification looks similar to the following:
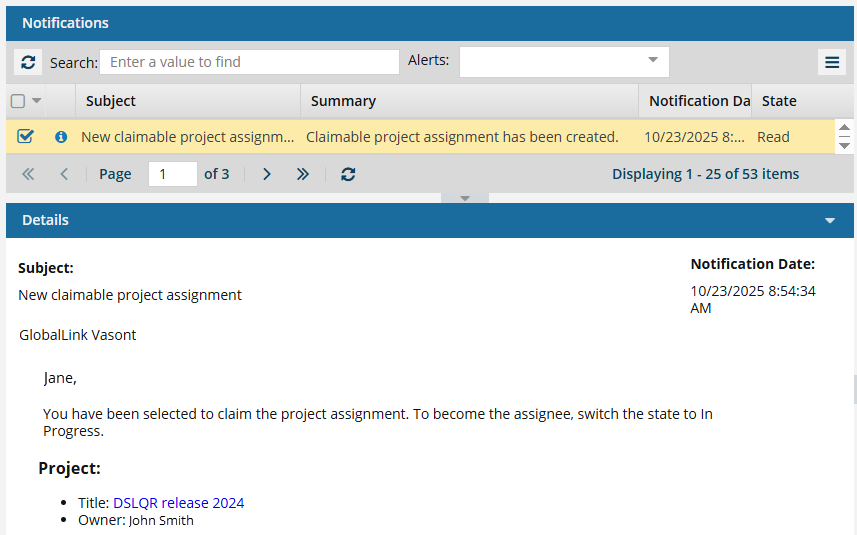
- In this case, you cannot use the notification to start work on the assignment.
- Instead, you must open the project to check and see if it has been claimed yet.
- Use the project link after Title and claim the assignment if it is still available.
- To claim the assignment, go to the Assignments panel. Look for an assignment that has a State of Ready to Claim. Right-click or use
 the Options menu to select Claim.
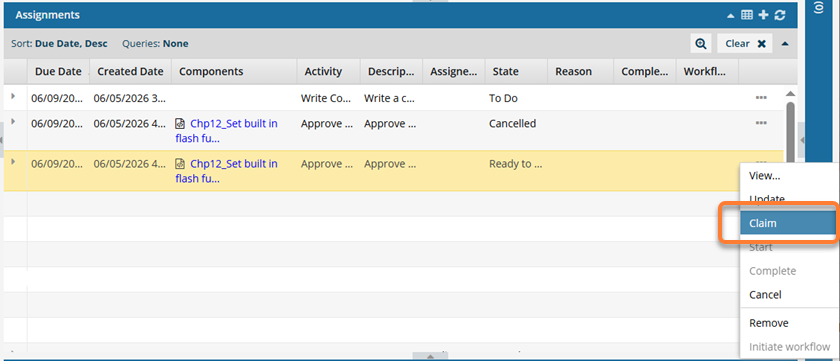

To complete workflow tasks for a project assignment:
-
Click
 Projects.
-
In the Assignments pane, select the assignment that is assigned to you, right-click it, and select View.
 A project assignment can be given a State of Ready to Claim. In this scenario, no specific user is assigned to complete the work. Instead, a list of possible users is identified, and they are all notified that the assignment can be claimed.
 - The first user to claim the assignment can complete the work.
- For more details, read: Claim an assignment.
 Results:
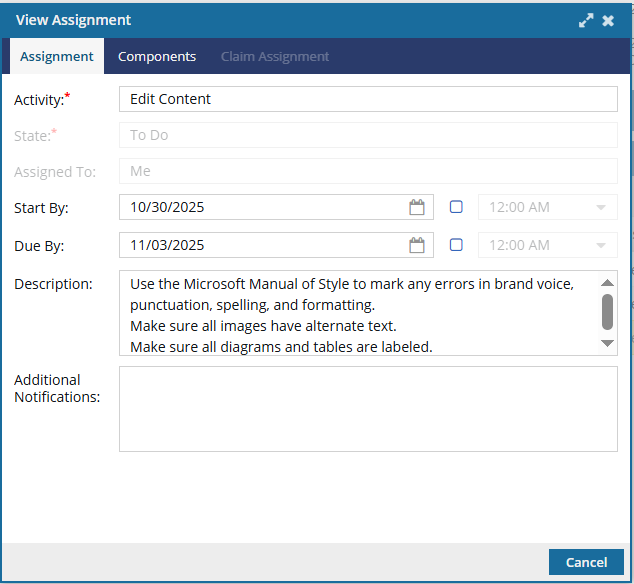
- Note the dates when you should start on the work (Start By) and when it should be done (Due By).
- Follow the instructions in the Description to complete the work.
-
On the Project Management tab, in the row listing the assignment you completed, select the Options menu, and then select Complete.
 Other options may be available to you:
Claim. If the assignment has a State of Ready to Claim, when you select Claim, Inspire changes the To Do state to In Progress.
Start. If the assignment is in the To Do State, after you select Start, Inspire changes the State to In Progress.
- Update. If you want to edit the assignment details or add components, you can select this option.
Cancel. In any state, you can stop the workflow. If you are an administrator, project owner, or the user who started the workflow, you can select Cancel to set the state to Canceled and stop the workflow.
Assignments connected with workflows cannot be canceled. Only single assignments (not used in a workflow) can be canceled from the Assignments pane.
-
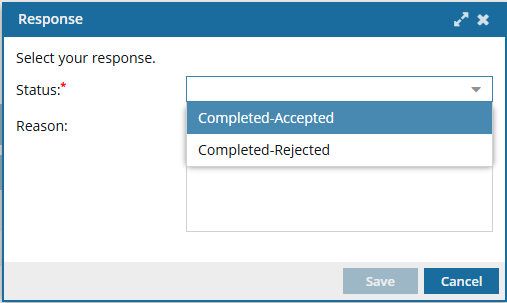
On the Response screen:
-
In Status, select one of the following options to set it as the assignment's State:
- Completed-Accepted
- Completed-Rejected Even if you select Rejected, the workflow still moves to the next task. If an Action is associated with the task you are rejecting, it will not occur, but the workflow will advance.
-
Click Save.
Results:
- The assignment is given the selected Status, and the workflow advances to the next activity.
Inspire captures a snapshot of all components included in an assignment each time a workflow activity is completed.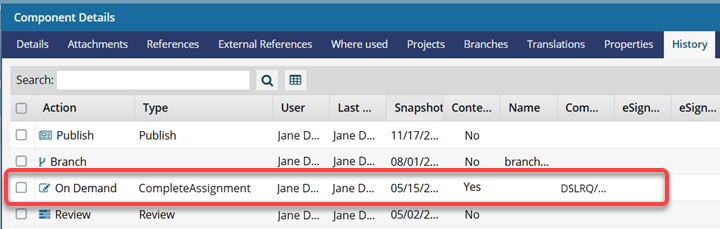
This snapshot is labeled with the following information:
Action = On Demand
(Process) Type = CompleteAssignment
Comment = Project Name/Workflow Name/Assignment Nam
-
In Status, select one of the following options to set it as the assignment's State:
-
On the Next Workflow Task screen, in the Assign To list, select the user that you want to assign the next workflow task to.
Even if the next workflow task is marked as Claimable, because this field is required, you must still select an available assignee. A list of users identified in the workflow will still get a notification to claim the work. Each time you complete an assignment in a workflow, you have the option to add a new Note to inform the next user's assignment.
- Each Note's content is saved along with the associated Project Activity, Assignment State, and who the Activity was Assigned To.
- The Notes option is only available for topic workflows and not available for review workflows.
- You also have the ability to edit the Description.