Add a translation project
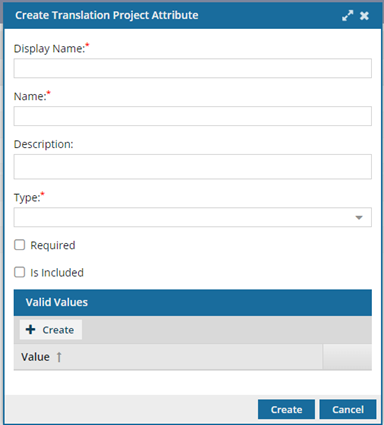
As an administrator, when you create a profile of a project type, you're only required to specify the name. You can also use optional fields provided for you or create your own attributes to describe a project type. When you create a custom project attribute and mark it as required, the attribute's value is sent as part of the translation job.
![]() You must have Administrator privileges to work with Translation project management.
You must have Administrator privileges to work with Translation project management.
![]()
 If you want to allow the use of Quotes for translation project, you must use a GlobalLink Enterprise Rest API integration method that allows it. For more information, refer to: Enable quotes for translation projects.

-
From the
 Administration menu, select Translation settings, and then Translation project management.
-
In Integration Method, select the way Inspire sends and retrieves translation content with an external application. You can associate only one integration per project type.
- GlobalLink Enterprise Rest API: Use this method to take advantage of a defined programming interface through which Inspire can request services or data from GlobalLink Enterprise.
 Project Director has been renamed to GlobalLink Enterprise. If you want to allow job Quotes, you must use a GlobalLink Enterprise Rest API integration method that allows it. For more information, refer to: Enable quotes for translation projects.
 - GlobalLink Portal: Use this method if you want to send content to GlobalLink Enterprise (formerly known as Project Director) using a transmission tool. GlobalLink Portal was formerly known as GlobalLink Transport.
- Manual: Use this method if there is no integration with external applications.
- GlobalLink Connect: you'll use this method if you want to send content to GlobalLink Enterprise using the GlobalLink Connect API.
- GlobalLink Enterprise Rest API: Use this method to take advantage of a defined programming interface through which Inspire can request services or data from GlobalLink Enterprise.
-
Optionally, you can click the Attributes tab to add details or instructions specific to this project type.
-
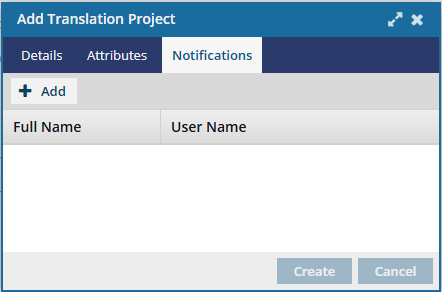
Optionally, you can add a list of Translation Coordinators who are notified when updates are made to a job that uses this project configuration:
-
Click
 Add.
Add.
-
On the Select Users screen, select the checkbox for each user that you want to be notified when a translation job is updated.
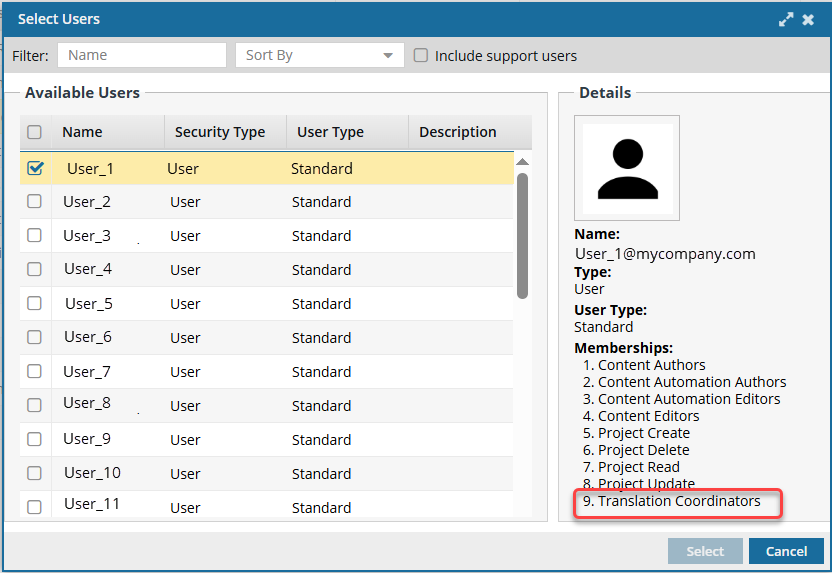 Important Notes:
- The User Type cannot be ReviewOnly.
- The user must have permissions to be a Translation Coordinator. To verify this, select the user and then look in the right pane to see a list of Memberships.
- The users you add to this list are only notified if a translation job uses this Translation Project.
-
Click