Edit a markdown component
After you import a markdown file as a component, you can edit the content even though it's stored as a Binary file. However, you have less tools to use when editing because a markdown file is also more simple than an XML document.
 Be aware that you don't have the tools necessary for XML editing, such as the:
- Left side panel with the XML structure
- Right side panel for XML attributes and validation
- Breadcrumb at the bottom of the screen for managing XML elements
This is by design because a markdown component doesn't use XML code.

To edit a markdown component:
-
To create a section:

-
To start a section with Header 1, put your cursor where you want the section to start. In the toolbar, click
 .
.
-
To start a section with Header 2, put your cursor where you want the section to start. In the toolbar, click
 .
.
-
To start a section with Header 3, put your cursor where you want the section to start. In the toolbar, click
 .
.
-
To start a new section with a horizontal line above, put your cursor where you want the section to start. In the toolbar, click
 .
.
-
To start a section with Header 1, put your cursor where you want the section to start. In the toolbar, click
-
To format text:

-
To format text as bold, select the text, and in the toolbar click
 .
.
-
To format text as italic, select the text, and in the toolbar click
 .
.
-
To format text with a line striking it out, select the text, and in the toolbar click
 .
.
-
To format text as a code block, select the text, and in the toolbar click
 .
.
-
To format the text as a block quote, select the text, and in the toolbar click
 .
.
-
To format text as bold, select the text, and in the toolbar click
-
To add a list:
-
To create a numbered list, put your cursor where you want the list to start. In the toolbar, click
 .
.
-
To create a list with bullets, put your cursor where you want the list to start. In the toolbar, click
 .
.
-
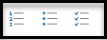
To create a task list, put your cursor where you want the list to start. In the toolbar, click
 .
.
-
To create a numbered list, put your cursor where you want the list to start. In the toolbar, click
-
To add a table:
-
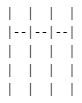
To insert a table, put your cursor where you want it. In the toolbar, click
 .
.
- Use the columns and rows to add your data.
-
To insert a table, put your cursor where you want it. In the toolbar, click
-
To add a reference to other content:
-
In the toolbar, click
 .
.
-
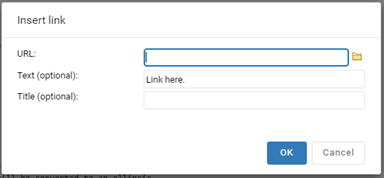
On the Insert link screen, enter or paste in the URL to the web page you want to add a link to. To browse and find a resource inside Inspire, click
 the folder icon.
-
Click OK.
 Results: You see a link inserted.
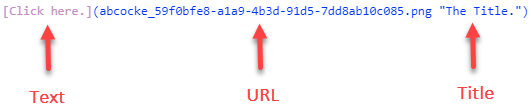
-
In the toolbar, click
-
To insert an image:
-
In the toolbar, click
 .
.
-
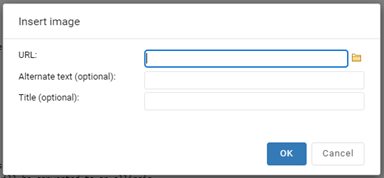
On the Insert image screen, enter or paste in the URL to the image you want to insert. To browse and find an image inside Inspire, click the folder icon.
-
Click OK.
Results: You see a link to the image you inserted.

-
In the toolbar, click
-
To report a problem:
-
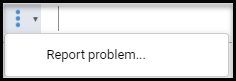
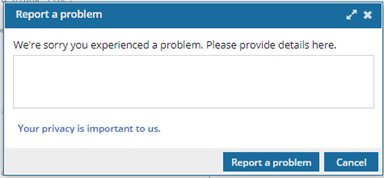
In the toolbar, click
 the more menu and select Report problem.
-
In the toolbar, click
-
To manage your file:
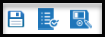
- To save your changes locally and keep working, click
 Save .
 - To save your changes to the database and close the map, click
 Save and Submit.
 - To save your changes to a new component, click
 Save as.
- To save your changes locally and keep working, click