Delete a custom schema
After you create a customized schema, you can hide it by clearing the Active option. When Inspire looks for schemas to use, only those marked as Active are identified. If you know you will never use a custom schema again, you can permanently delete it.
![]() You must have administrator permissions in Inspire to complete this task.
You must have administrator permissions in Inspire to complete this task.
To hide a custom schema:
-
From the
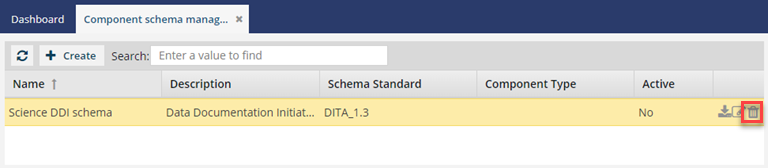
 Administration menu, select Advanced settings, and then select Component schema management.
-
On the Component schema management tab, find the schema you want to update, select the row, and then click Update
 .
.
-
On the Update Component Schema dialog, clear the Active option.
 The Active option is useful if you want to test schemas. For example, you can upload two schemas and switch back and forth between them.
To delete a custom schema:
![]() Use caution when deleting a custom schema as you can't undo the action. Schema files are not sent to the Deleted Items folder, they are permanently deleted.
Use caution when deleting a custom schema as you can't undo the action. Schema files are not sent to the Deleted Items folder, they are permanently deleted.
-
From the Administration menu, select Advanced settings, and then select Component schema management.
-
On the Component schema management tab, find the schema you want to delete, select the row, and then click Delete
 .
.