Create a project from components
From the Components browser you can create a project by selecting the components you want to include. Then you can add the participants and assignments that you are using in the project. When you create a project, Inspire assigns you as the project owner.

-
Click
 Components.
-
In the Selected Components pane:
a. If you need to, you can use
 Options menu options to work with the component:
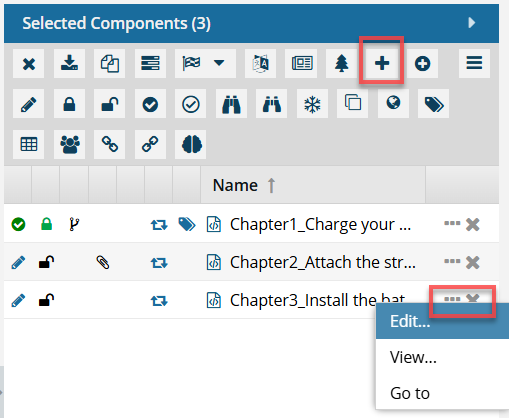
- Edit - Opens the component in the Oxygen XML Editor. If the component is a workflow, it opens in the workflow editor. This option doesn't work for binary components.
- View - Opens the component in the Oxygen XML Editor as Read Only. If the component is a workflow, it opens in the workflow editor in read-only mode. If the component is a binary, it opens in a viewer.
- Go to - Displays the component on the Components tab in the grid and selects the component. If the component isn't listed on the first page, Inspire displays the page where it is listed.
b. Click Create project.
 -
To assign work on components to team members, follow the steps in Assign a project task to a participant.
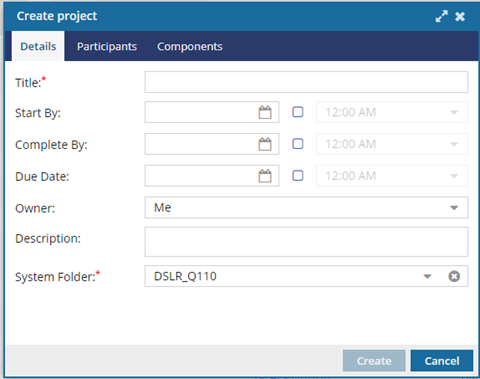
Add optional details
-
On the Details tab, to choose a date when the project begins, in Start By, click the calendar
 to select the current date or a date in the future
-
To choose a date when all the work should be completed, in Complete By, click the calendar to select a date that's after the Start By date.
-
To choose a date when the completed work is due to be handed off to the next stage, such as publishing or a translation vendor, in Due Date, click the calendar to select a date that's after the Complete By date.
-
To add more details about the project, in Description, enter text up to 1000 characters.
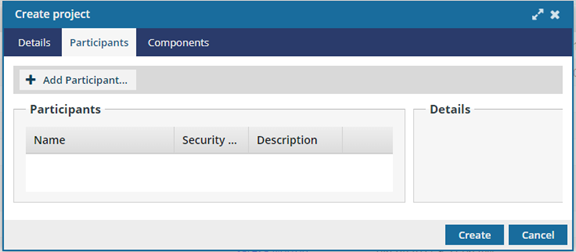
Add optional participants
 Keep in mind that after you add a participant to a project and give them tasks to complete, you might not be able to easily remove them. You can't remove a participant from an active project if they are:
- A reviewer, approver, or coordinator of an active Review workflow in that project.
- A reviewer or coordinator of a Topic workflow in that project.
- Given an assignment in that project.
For more details, read: Remove participants from a project.
To add optional participants:
-
In Available Users/Roles, select the option next to each group and user who will work on this project.
 When you click on a user, you see the Details pane to the right of the Users pane. You can use these details to make sure the user has the permissions they need to complete work on this project.